Search the Community
Search Filters
Content tagged '582'
Found 16 results
Results
-
Post on Kitfox IV 582 vs. 912(80hp) only in Kitfox IV
By motortommy, postedI know that this topic has been discussed several times, but anyway I would like to ask for some real life experiences. There should be folks who meanwhile have experience with both 2 and 4 stroke powerplants…
Due to microlight regulation I`m interested mainly in comparison of 65(582) vs. 80 hp (912). So no focus on 912uls, zipper, edge,… options
Is the swap worth the effort? Why/why not?
Aside from short following pro and con list, how did your Kitfox IV changed? What real life numbers did you gain?
con
cost (engine, mount, prop, accessories,…)additional weightno ideal installation with early mount (oiltank, carb position, …)approval procedure neededno quick and easy swap (cowling, cooling System, avionics,… are affected)…
pro
improved reliabilitysimplified operation proceduresbetter resale value of the planeincreased performance (cruise/climb)…
Thanks for any insights!
-
Post on Carb heat box in Technical tasks
By Good old number 29, postedWithout starting a debate about engines that don’t need it, here is a cheap and effective way to rig up carb heat. It requires only hand tools to build. Including prep time and layout, it took me six hours to make. I had the sheet metal and the heat muff already, so my only cost was $12 for the control cable. Estimated cost for all the materials is less than $100.
Here is the finished product:
The cable actuates a flapper door to select one of two outlets. One outlet goes to the carb, the other to cabin heat. The inlet air comes from the heat muff on the muffler. The diverter box could also be used select defrost or floor heat, or hot or cold air.
Tools and Materials:
12” x 18” of .025” 2024 T3 aluminum
1/8” aluminum pop rivets, 1/8” & 1/4” lengths
Heat muff for the exhaust
5 feet of 1-1/2 inch diameter high temp hose
16 penny galvanized nail
2”x 3-1/4” 20 gauge galvanized steel
(2) 1/2” #6 machine screws with lock nuts
(5) 1-3/4” hose clamps
Bench vise
Drill
Drill bits
1-1/2” hole saw
Tin snips
Hand seamer
Hand riveter
Flat metal file
Pliers
Screwdriver
hack saw
1” diameter pipe, tubing, or dowel
NAPA choke cable
Wire-feed welder
Steel welding wire
The process:
I will attach more pics for clarification of these confusing directions. It is not as hard as I make it sound. Currently only able to load one pic. I’ll load the rest when I’m able.
Cut four pieces of T3 at 5-1/8” x 1-1/2. Mark at 4-9/16”. Bend each piece around the 1” pipe to round it into a 1-1/2” long x 1-1/2” o.d. tube. Use the hand seamer to finish the radius on the ends. Overlap the end to the mark that you made. Use a hose clamp in the middle to hold it at the right diameter, drill and install two rivets in the seam. It should fit tightly in a 1-1/2 hole, and the heater hose should slide on tight. Make parallel cuts 1/2” apart, 1/2” long, up from one end. This 1/2” will bend out to make a tab which will be used to rivet it to the body of the diverter box. Make three tabs, equally spaced, on one end of each tube. Bend them up very carefully, using the pliers. Spread the bend out a bit. The tabs will break right off if you just pinch and bend.
Cut a flange out of T3 for the air filter, as seen in the picture. It should be about 8” square. I angled the top corners down from the rivets. Snip 1/8” off the corners at a 45°, and round them with the file. Do that on all the sharp corners. Brake it 90° at 2-1/2 inches, clamped between two pieces of wood in the vise. Use the hole saw to cut a hole in the center of the short side. Attach one of the 1-1/2 hose fittings by sliding the short end into the hole, tight to the three tabs, then drill and rivet in place. Mark 2-1/2” up from the 90, drill and rivet the plate to the back of the air filter with four rivets, with the bottom of the air filter at the mark, leaving 2-1/2” gap to the 90° flange.
Mark out the diverter box. One piece will make the bottom and sides. A second piece will be the top. I’ll post more pics to make this part clearer. The box is two inches deep. One end of the box is two inches wide. It is four inches long. The other end is four inches wide. Take a 9” square of T3. Measure 2-1/2 inches from the edge, and mark the shape of the box. Mark 2-1/2” out from both sides and the ends, parallel to the sides of the box. The sides of the ends should be 1/2” longer than the bottom, to wrap around the sides. That is, the bottom and sides are one piece, and it all folds up, with the ends wrapping over the sides to be riveted together. Mark 1/2” from the top of each side. Brake the sides up 90° from the bottom of the box. Brake the 1/2” at the top 90° down, to the inside, parallel to to bottom. This is the flange to which the top will mount. Brake the 1/2” ends around the sides, drill, and rivet in place. Mark center on the short, 2” square end, and put the hole saw there. On the opposite end, mark and cut two holes with the hole saw, 1” on center from each side. Rivet one of the hose adapters in each of the three holes.
At the long end of the box, top and bottom, centered, and tight to the end, drill a hole to fit the 16D galvanized nail through. One hole will be on the bottom, and one will be on the flange at the top. This is for the flapper hinge. Cut 2-5/8” x 2” from the 20 ga. galvanized sheet. Radius the corners. It should fit tightly to one side of the nail. Trim the tight spots so it fits easily when it pivots to either side, without much gap. Allow the head of the nail to have some end play so it doesn’t bind. Tack weld the flapper securely to the nail. I used L56 .025”. Test to make sure it has free and full movement.
Cut the top of the box. You could trace the bottom, or mark it 2-4x4. Cut it 1/8” small, and the edge won’t stick out. Cut a notch in the long end to clear the nail. Nip and file to clean up and smooth the edges. Making sure the box is straight, not warped, drill for two rivets on each side, through the top, into the flange beneath it, placed so they do not interfere with the movement of the flapper, and rivet it in place.
Cut 3/4 x 1-1/2 from the remaining scrap of galvanized sheet. Use the hand seamer to bend it into a U shape, the short way, so you have a 1-1/2” long stick of 1/4” channel. Drill a hole in one end to fit over the nail. Drill one or more holes in the other end to attach the cable. Fit this actuator lever over the nail, in line with the flapper, leaving 1/8”-3/16” space between the top of the box and the lever, and tack weld it to the nail. Cut off the end of the nail above the lever, using the hack saw.
Cut 1-1/2” square and another piece, 1/2 x 3/4”, from the T3. Make a 1/2” cut, 1/2” in from one side. Brake it 90° down along that line, then carefully bend the cut end out about 60°. This is the cable mount. Bend the small piece slightly to fit the cable housing, clamping over top of it. Again, using caution to avoid interference with the flapper, rivet the cable mount to the base with three rivets; two on top and one through the tab on the side. It should be placed so the cable is at the proper place and angle to push and pull the actuator lever through its full range of motion. Position the top clamp, drill, and attach with the two #6 machine screws.
Attach hose from heat muff to box inlet. Attach hoses from the two outlets, one to the carb heat, the other to cabin heat. Mount the air cleaner, mount the box (not blocking flapper travel with any hardware), mount the cable.
-

Post on Newbie wanting to see an Avid or Kitfox in Florida in Avidfoxflyers General Hangar
By skyskate, postedNewbie wanting to see an Avid or Kitfox in Florida. Mk4 near West Palm Beach if possible. New sport pilot shopping for first plane. Trained in a Technam. Never saw an Avid or Kitfox up close let alone fly in one
Thanks
skyskate
-

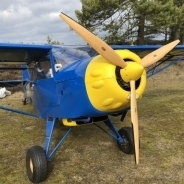
Post on What pitch to use on a 582 3 blade 68" Kiev 2.58 gearbox in Two Strokes
By TSoftware, postedI got the engine running today. The wooden propeller from the 532 wouldn't fit, so I started off with my new 68" Kiev three blade propeller. The instructions said that the starting point for a 582 should be 11-14, so I set it at 12. The old 532 Tachometer seems wildly off, so I have connected up a Tiny Tach. I warmed up the water temperature, increased throttle to get the EGTs up and then pushed it up to wide open throttle, but only got to 3400 RPM. I am running a 2.58 gear box. I am not sure if it is the throttle assembly or the propeller that is giving me the issue. So can anyone provide at least some idea of what pitch should be used? I tried the test twice and still need to break in the engine. I am currently running the gas at 100:1 in addition to the oil pump as recommended by Rotax in the 582 installation manual.
TIA
-
Well, I have my 582 to the point where it has all the fluids and I can run the starter. I hooked up the oil injection and bled the system by removing the bleeder bolt. I would have thought I could just turn over the engine and I should see oil start to creep up the oil injection lines, but I am not. Is this a valid test or is the pump slow enough that the engine needs to be running for a bit before I will see oil in the injection lines?
TIA
-
I'm looking for a nice prop for my Avid Flyer C with a 582. "The backwards prop." I'm in California and glad to pay shipping, etc. You guys know what I need! Open to related comments and suggestions.
-
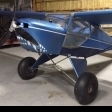
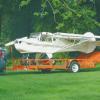
Post on Finally Got One! in Avid Model C
By SgtFlyer, postedI picked this baby up, locally, near Sacramento. Maybe someone here might even recognize it? Rotax 582. We're at KGOO.
-
Post on First Flight in Avid / Speeds/ Temps??? in For Sale and wanted, you got it, I want it
By Avidflyerron, postedHi, I just bought an Avid Mark IV with a 582 and am about to make take my first flight. I've been doing a lot of taxiing since I don't have any tail-wheel time and am comfortable so far.
Can anyone tell me what the operating temps should read, CH and water temp? Also What should my approach speed be for landing and flare? What is the stall speed?
The previous owner said he flew by "feel" and never looked at the gauges.
Thanks
-

Post on Borescope Rotax 582 in Rotax and other engines
By nlappos, postedHere is the inside of one of my engine cylinders, using a TV borescope: 130 hours since new, 42 with 100LL, the rest with Mogas. Comments??
-
While I'm working on my wings, I sometimes start to think ahead to the engine. Since I'm new to Rotax 2 stokes I've been digging around for information to educate myself. My wrecked project came with the MK4 style cheek radiators. One of them is a bit damaged though, so I'll have to have it repaired or find a new one. The bottom cowl is destroyed, so that will need to be fixed.
I came across this article though, and it got me thinking:
Avid_Speedwing_Mk_4_Flyer__G-LORT_02-11_accident_report.pdf
It seems to me after reading the report that the single radiator down low like the earlier Avids might be less prone to overheating if you loose a little coolant. The earlier style also seems closer to what Rotax suggests for a layout:
I really like to looks of this setup:
What do you guys think?
Avid_Speedwing_Mk_4_Flyer__G-LORT_02-11_accident_report.pdf
-
Post on Questions about a 582 in Avidfoxflyers General Hangar
By Luked, postedHey, I've got a question for the Rotax 2 stroke experts. I'm planning to go look at a project plane with a 582. The oil injector failed. Owner said it turns over. That's about all I know for now. Is it likely that it could be rebuilt? What should I look for? Exhaust is removed. I'm thinking of getting this plane flying for some inexpensive local flying while I work on my other project.
-

I wasn't sure which forum thread to put this in but since it all seems engine related here it is.
So, what IS and what ISN'T normal vibration for a 582?
I'm getting vibs between 3200 -- 5200 rpm.
At t/o power all is well and smooth -- engine runs right up to 6400 -- throttle her back to 5800 or 6 and climb out. Rolling downwind pull her back to 5200 a disconcerting feel in my seat and sound "bump", nother second or 2 *bump*; that I can feel and hear how I best can describe it. Mixture? -- Lean or rich (because of improper fuel/oil ratio)? I'm running the injector and Rotax Rick wants me to add an extra 3.2 ounces per 5 gals to ensure adequate main bearing lube as he puts it.
Pull back to around 4k and let the nose down to base leg; now I'm getting a tingling in the foot pedals. Rolling on to base, 3500 rpm and my feet are tingling and the plane is vibrating.
Is this normal?
The other factor is the IVO prop. I hear they can be rough. I'm thinking I've got 2 distinct problems going on. One ea with the prop and the engine.
Today at warmup. I did take notice on the ground the vibration is definitely beginning at 3500.
All you folks running IVO IFA please chime in.
Thanks.
-
Post on Avid Flyer Short Wing - For Sale - Upstate NY in For Sale and wanted, you got it, I want it
By n757jh, postedFresh annual, brand new blue head 582 installed, 115 TTAF. For more details and photos:
https://www.facebook.com/pages/Avid-Flyer-For-Sale/270446786333995
-
Post on 582 Thermostat in Rotax and other engines
By allonsye, postedOne of the few parts I'm missing to complete my Mdl C FWF project is a thermostat for the Gray Head. I'm reeling from the price tag of $130 + shipping that Lockwood and CPS charges. Is there an alternative? I cannot imagine that these thermostats cost this much unless because I'm looking at "aircraft" parts instead of for a sled.
-

Sorry for any confusion, I made a mistake in the topic title for the previous listing for this airplane & couldn't seem to edit it. So I'd like to try this again.......
For your consideration,
This was a flying aircraft in 2006. It has been stored indoors since then. It is complete and is considered a running project. The Left wing tank leaks. 190.7 hours on airframe & engine. The engine is a Blue Head 582 DCDI. Dual 13 gallon tanks, Cheek radiators, Heavy Hauler wing with heavy lift struts & heavy spars .083", 8.00 X 6 tires and brakes, Dual stick controls, basic panel with compass, airspeed, altimeter, slip, dual EGT, water temp, Tach, hourmeter, & ELT. Empty Weight = 470lbs. Build manual & tow bar are included. This is an excellent project plane that will produce a very nice flying Avid in a short time with little work. Please call or email with any questions. 912-508-4713 flyhigh_gv@yahoo.com.
Asking $ 12,000
Reasonable offers considered. Trades welcome.
-
Anyone interested in my Avid C? Needs 0 time gray 582 hung. 330hrs TT bird is complete.
HH wing
550 EW
1150 Gross
12 gal Wing tanks
Basic Panel
Whelen wing tip strobes
Skis (don't know kind but are the tires on/though design).
Mdl IV Fuselage (straight non-curved fuselage)
Cheek radiators
Flt adjtbl IVO Prop
Nifty tail mounted tow bar to pull it w/out a trailer
All logs and build history
This is a great bird and wish I could keep but a variety of things just came up and I could use the cash.
$9800 takes it.
Serious purchase inquiries please. Pics on request.
Paul
Denver, NC
(quartered at Lincoln Cnty Airport, Lincoln NC)